- Published on
Part 1: Secrets Detection in a DevsecOps Jenkins Pipeline
- Authors

- Name
- Benson Macharia
- @benson-macharia
In today's fast-paced development environment, the integration of security into the DevOps pipeline—often referred to as DevSecOps has become essential. A critical aspect of DevSecOps is the detection and management of secrets. Secrets, such as API keys, passwords, and other sensitive information, are often inadvertently committed to source code repositories, posing significant security risks. Configuring secrets detection in your Jenkins DevSecOps pipeline is a proactive measure to mitigate these risks.

In this blog, we will explore how to configure secrets detection within a Jenkins DevSecOps pipeline. We will follow a step by step guide to integrate TruffleHog and Yelp Detect-secrets opensource tools into our Jenkis pipeline and examine how they can be used to identify sensitive information in our source code.
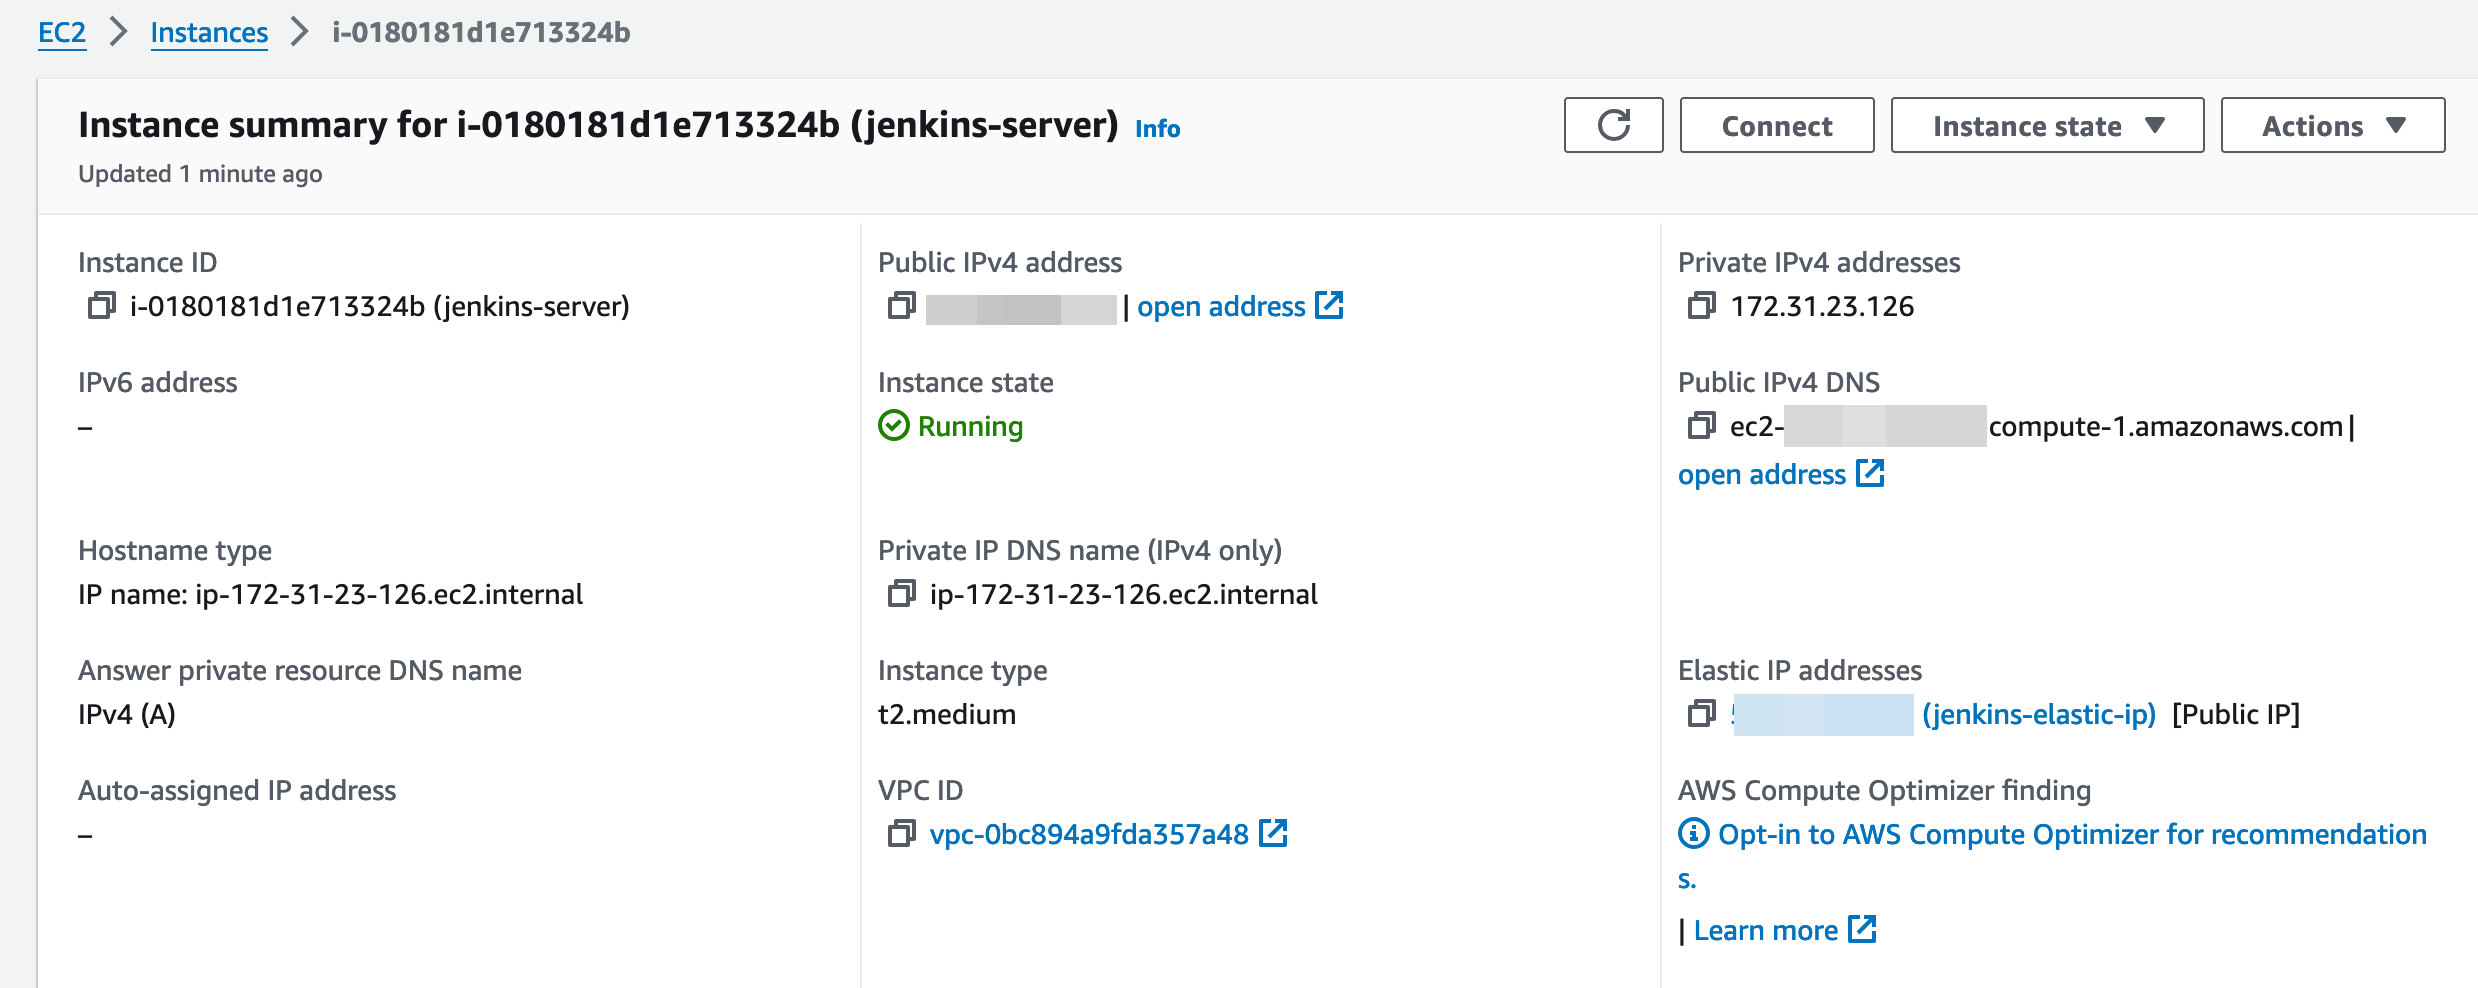
AWS EC2 Launch
- Open AWS console and go to the EC2 Dashboard.
- Launch a new instance and call it
jenkins-server. For the AMI, use theUbuntu Server 24.04 LTSandt2.mediuminstance type. - Remember to select a key pair and allow SSH traffic from anywhere on your security group. Everything else, use deafult settings and launch the instance.
- (Optional) You can create an Elastic IP address to associate to your new instance.
Jenkins Installation
- SSH into the jenkins-server EC2 instance
ssh -i "YourKeyPair.pem" ubuntu@jenkins-server-public-ip - Update the instance
$ sudo apt update && sudo apt upgrade - Install OpenJDK 17. This is required by Jenkins to run.
sudo apt install fontconfig openjdk-17-jre - From the Jenkins official guide, we get the following below command to install Jenkins.
sudo wget -O /usr/share/keyrings/jenkins-keyring.asc \
  https://pkg.jenkins.io/debian-stable/jenkins.io-2023.key
echo "deb [signed-by=/usr/share/keyrings/jenkins-keyring.asc]" \
  https://pkg.jenkins.io/debian-stable binary/ | sudo tee \
  /etc/apt/sources.list.d/jenkins.list > /dev/null
sudo apt-get update
sudo apt-get install jenkins
- Start the Jenkins service
sudo systemctl status jenkins - Enable Jenkins to start on boot
sudo systemctl enable jenkins - Go to the AWS Management Console, navigate to your EC2 instance, and check the associated security group’s inbound rules. Add a rule allowing incoming traffic on port 8080.
- Now on your browser you should be able to navigate to
http://instance-public-ip:8080to acess the jenkins web interface.
Jenkins Configuration
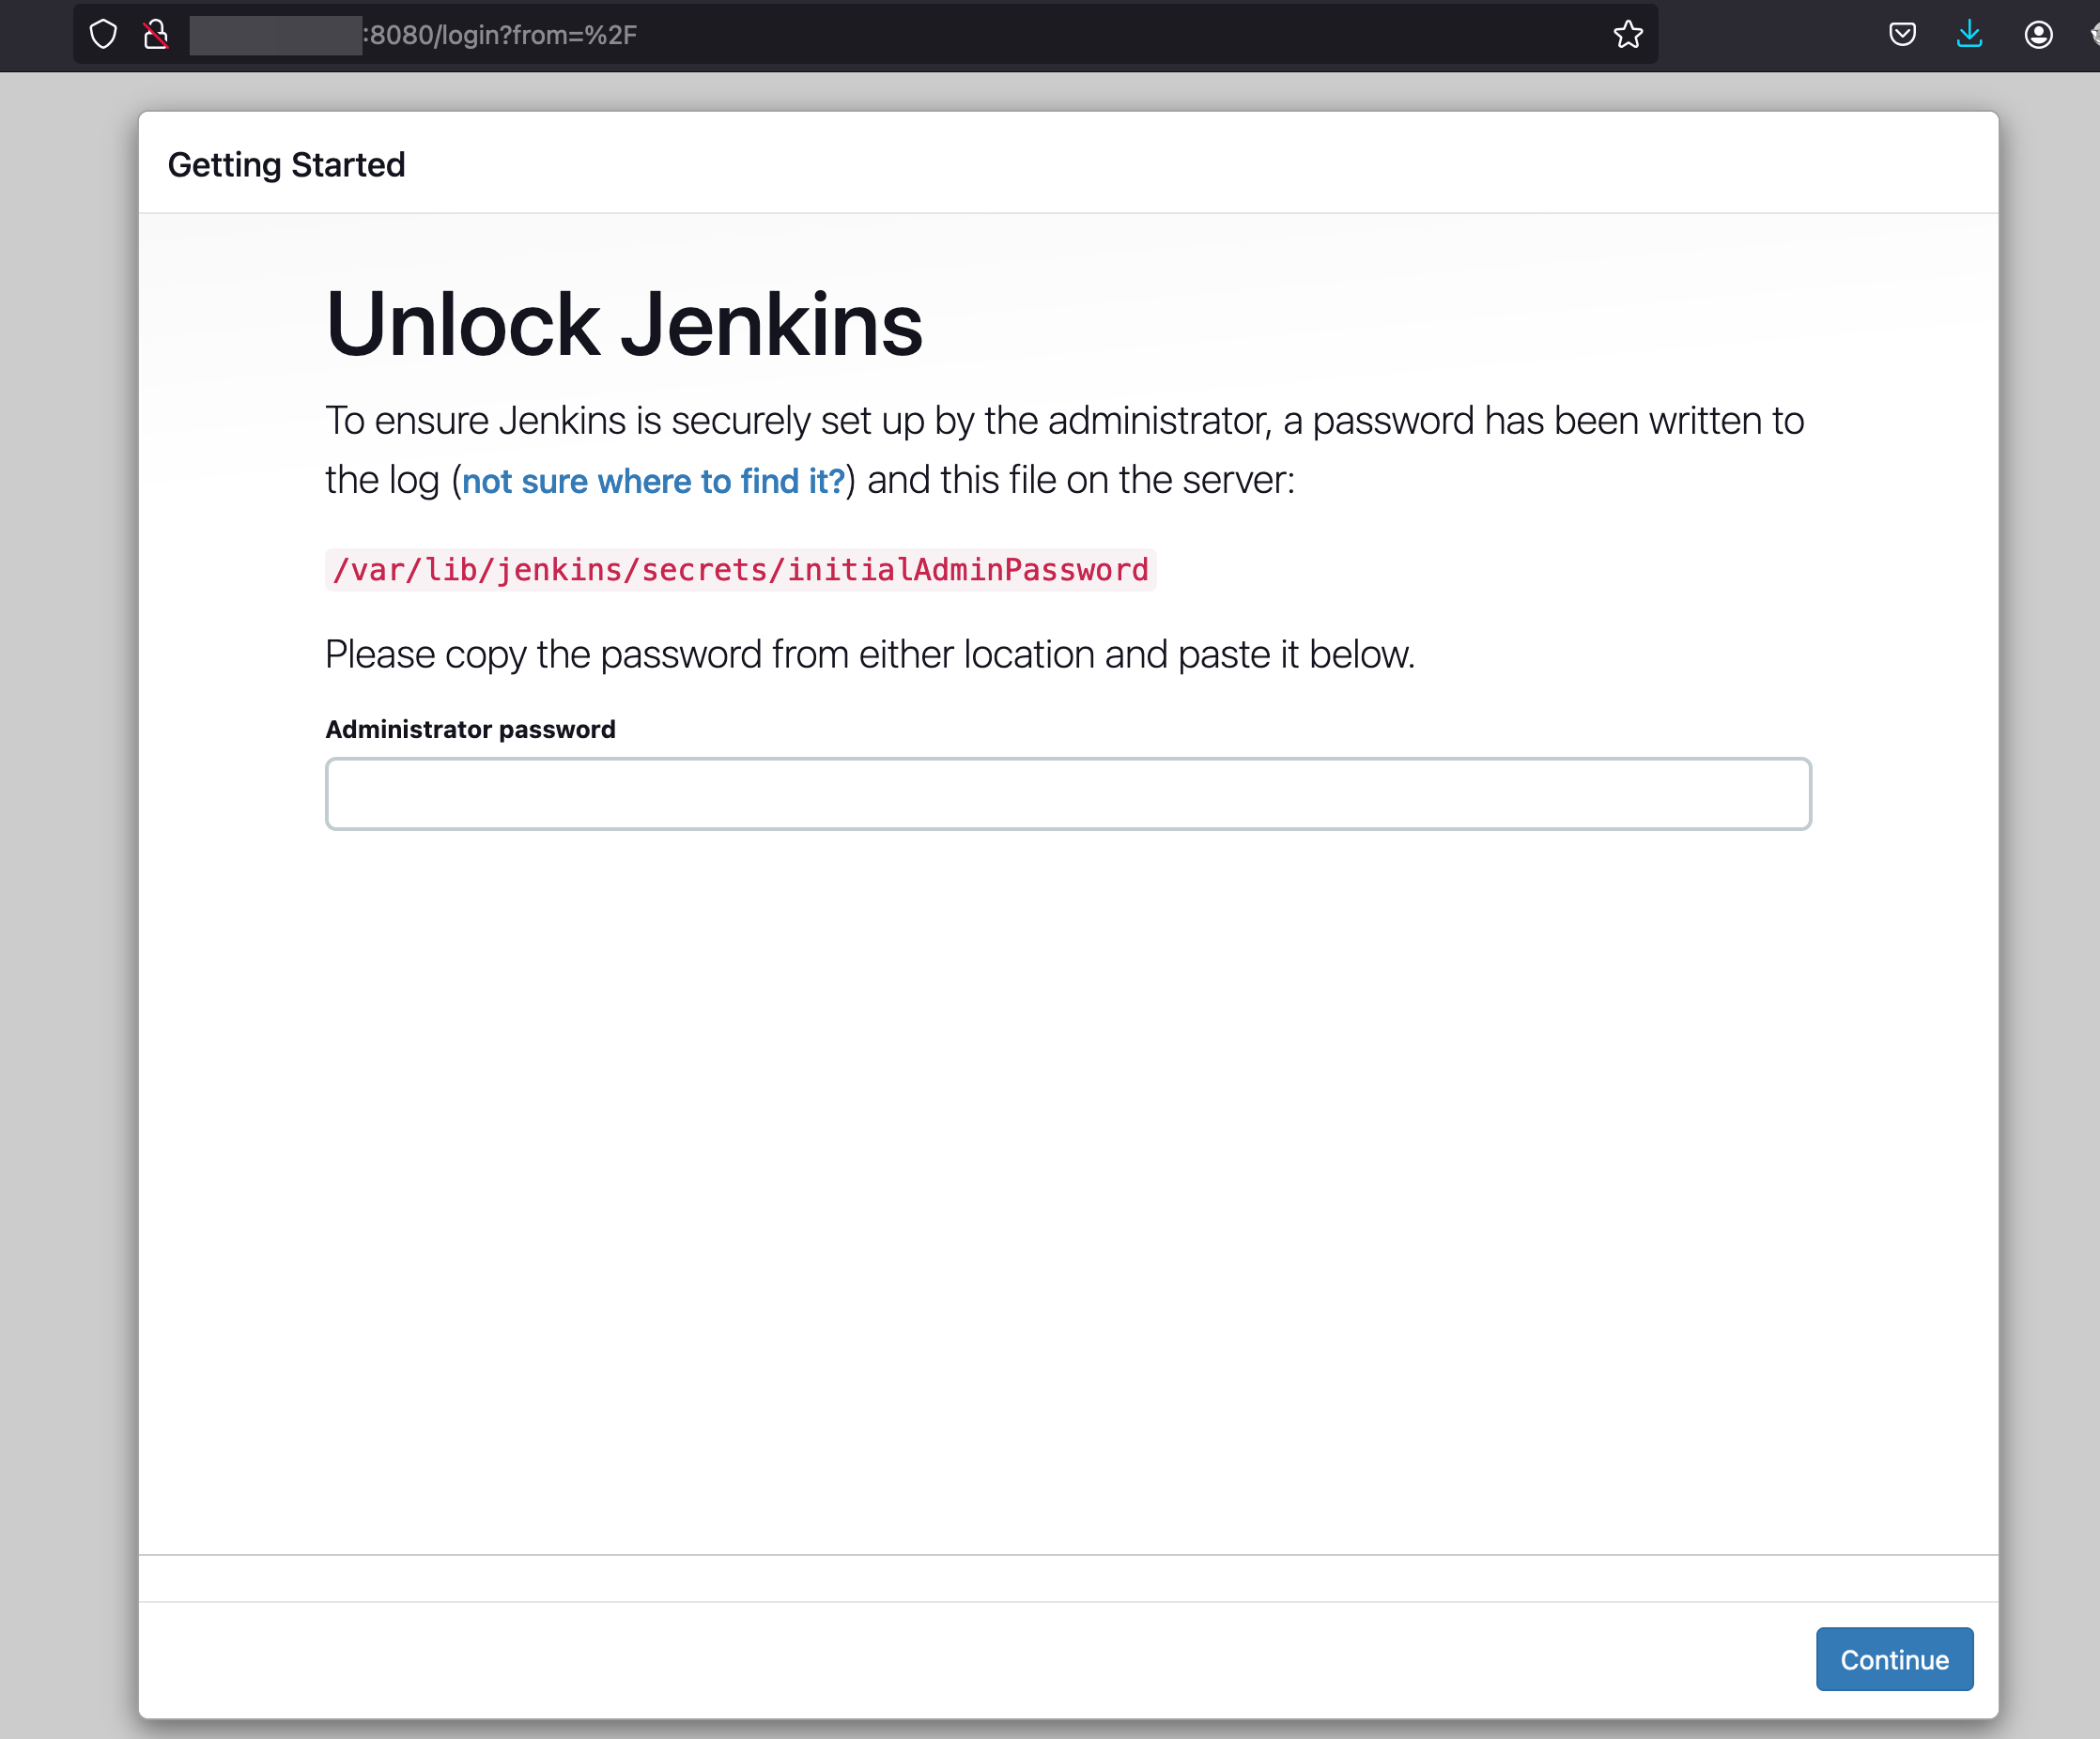
- Retrieve the initial admin password and paste it into the Jenkins setup wizard to proceed
sudo cat /var/lib/jenkins/secrets/initialAdminPassword - In the next step, choose the option to install recommended plugins. This will install the necessary plugins for basic functionality.
- Create an admin user account with your desired credentials.
- Follow the remaining steps in the setup wizard to complete installation.
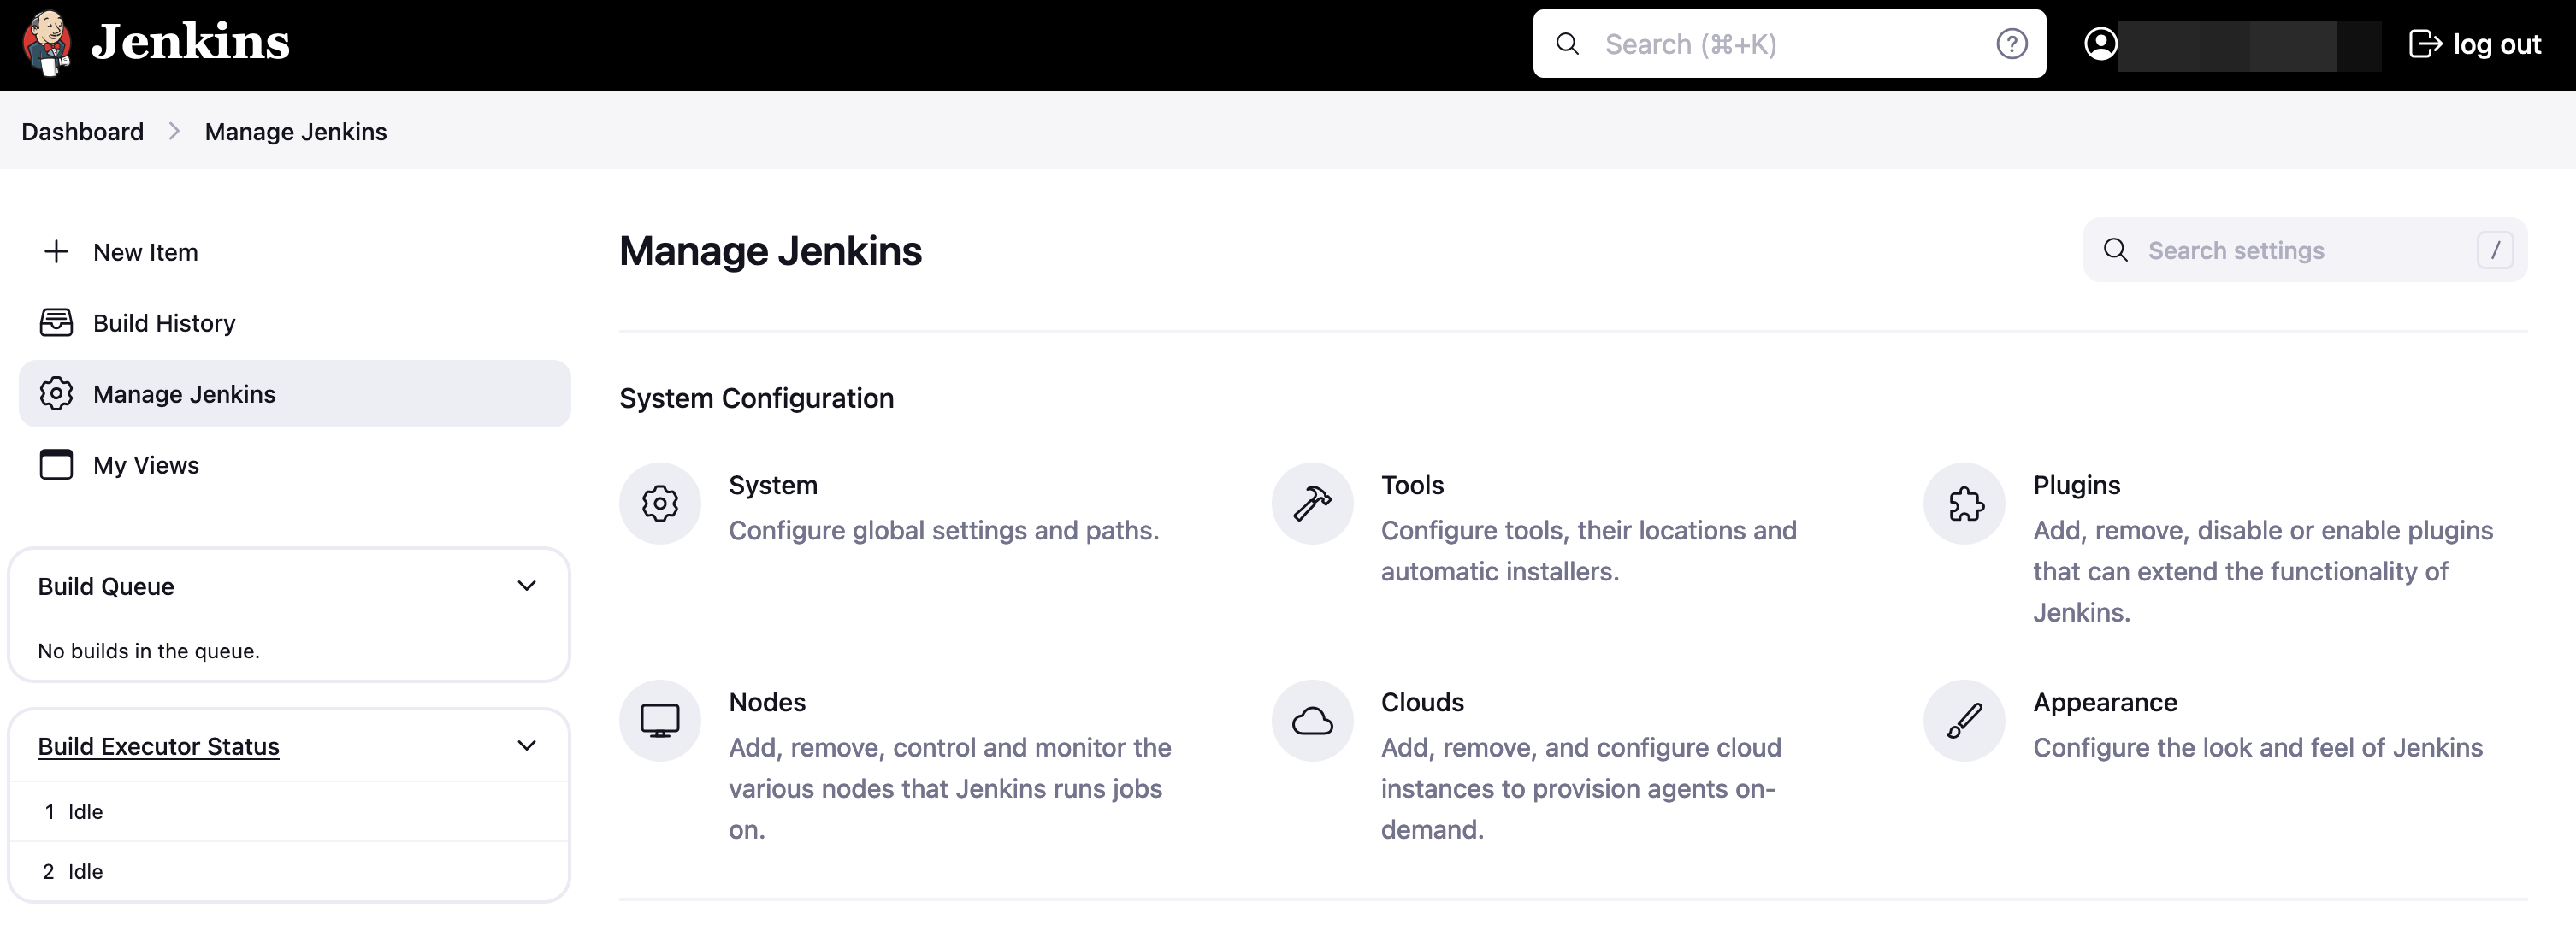
Creating a Pipeline
- Click on “New Item” and then select the “Pipeline” option to start creating the pipeline. Give it a name.
- Under General, give the pipeline a simple description and leave everything else with default configuration.
- Leave the Advanced Project Options with default configuration and proceed.
- For the pipeline script, we will add the following below stages.
1. Repository cloning
- We start by cloning the project source code from a Git repository. In this case we will use Vulnado which is an intentionally vulnerable Java application.
- We will pull the application code from the master branch using git. We don't need to install git as our ubuntu server comes with git installed.
- This is our script for this first stage.
pipeline {
    agent any

    stages {
        stage('Checkout') {
            steps {
                // Clone the repository master branch
                echo 'Cloning the code from our repo ...'
                git branch: 'master', url: 'https://github.com/ScaleSec/vulnado.git'
            }
        }
    }
}
- After writing the script, press the save button. Then on the left pane click on the Build Now and confirm a successful build from history and console output.
2. TruffleHog scan
- TruffleHog is the first tool we are going to use for detecting secrets in our codebase.
- We will need to first install TruffleHog on our Jenkins ubuntu server before adding its scanning stage on our pipeline.
# Install TruffleHog
$ curl -sSfL https://raw.githubusercontent.com/trufflesecurity/trufflehog/main/scripts/install.sh | sh -s -- -b /usr/local/bin v3.81.9
# Verify TruffleHog installation
$ trufflehog --version
- Now we can add TruffleHog scanner into our pipeline as below
stage('TruffleHog') {
    steps {
        echo 'Running TruffleHog scan ...'
        // Run TruffleHog scan on the checked-out repository
        sh 'trufflehog git https://github.com/ScaleSec/vulnado.git --json --no-update > trufflehog-results.json'
        // Optionally, you can archive the results
        archiveArtifacts artifacts: 'trufflehog-results.json', allowEmptyArchive: true
        // Read and print results to console
        script {
            def truffleHogResults = readFile('trufflehog-results.json')
            echo "TruffleHog Scan Results: ${truffleHogResults}"
        }
    }
}
3. Yelp detect-secrets scan
- Detect-secrets is the second tool we are going to us to scan for secrets in our code base.
- Detect-secrets tool is written in Python and installed with
Pip. We therefore need to installpiporpipxin our server and then the detect-secrets tool as follows.
# Install pipx
$ sudo apt install pipx
# Add ~/.local/bin/ in PATH environment variable
$ pipx ensurepath
# Switch to the Jenkins user
$ sudo su - jenkins
# Install detect-secrets
$ pipx install detect-secrets
# Update PATH environment variables
$ pipx ensurepath
# Verify detect-secrets tool installation
$ detect-secrets --version
- Our detect-secrets stage on the pipeline will look as below
stage('Detect Secrets') {
    steps {
        script {
            try {
                // Run detect-secrets scan
                sh 'detect-secrets scan > detectSecretsResults.json'

                // Archive the scan results
                archiveArtifacts artifacts: 'detectSecretsResults.json', allowEmptyArchive: true

                // Read and print results to console
                def detectSecretsResults = readFile('detectSecretsResults.json')
                echo "Detect Secrets Scan Results: ${detectSecretsResults}"
            } catch (Exception e) {
                echo "Error running detect-secrets: ${e.getMessage()}"
            }
        }
    }
}
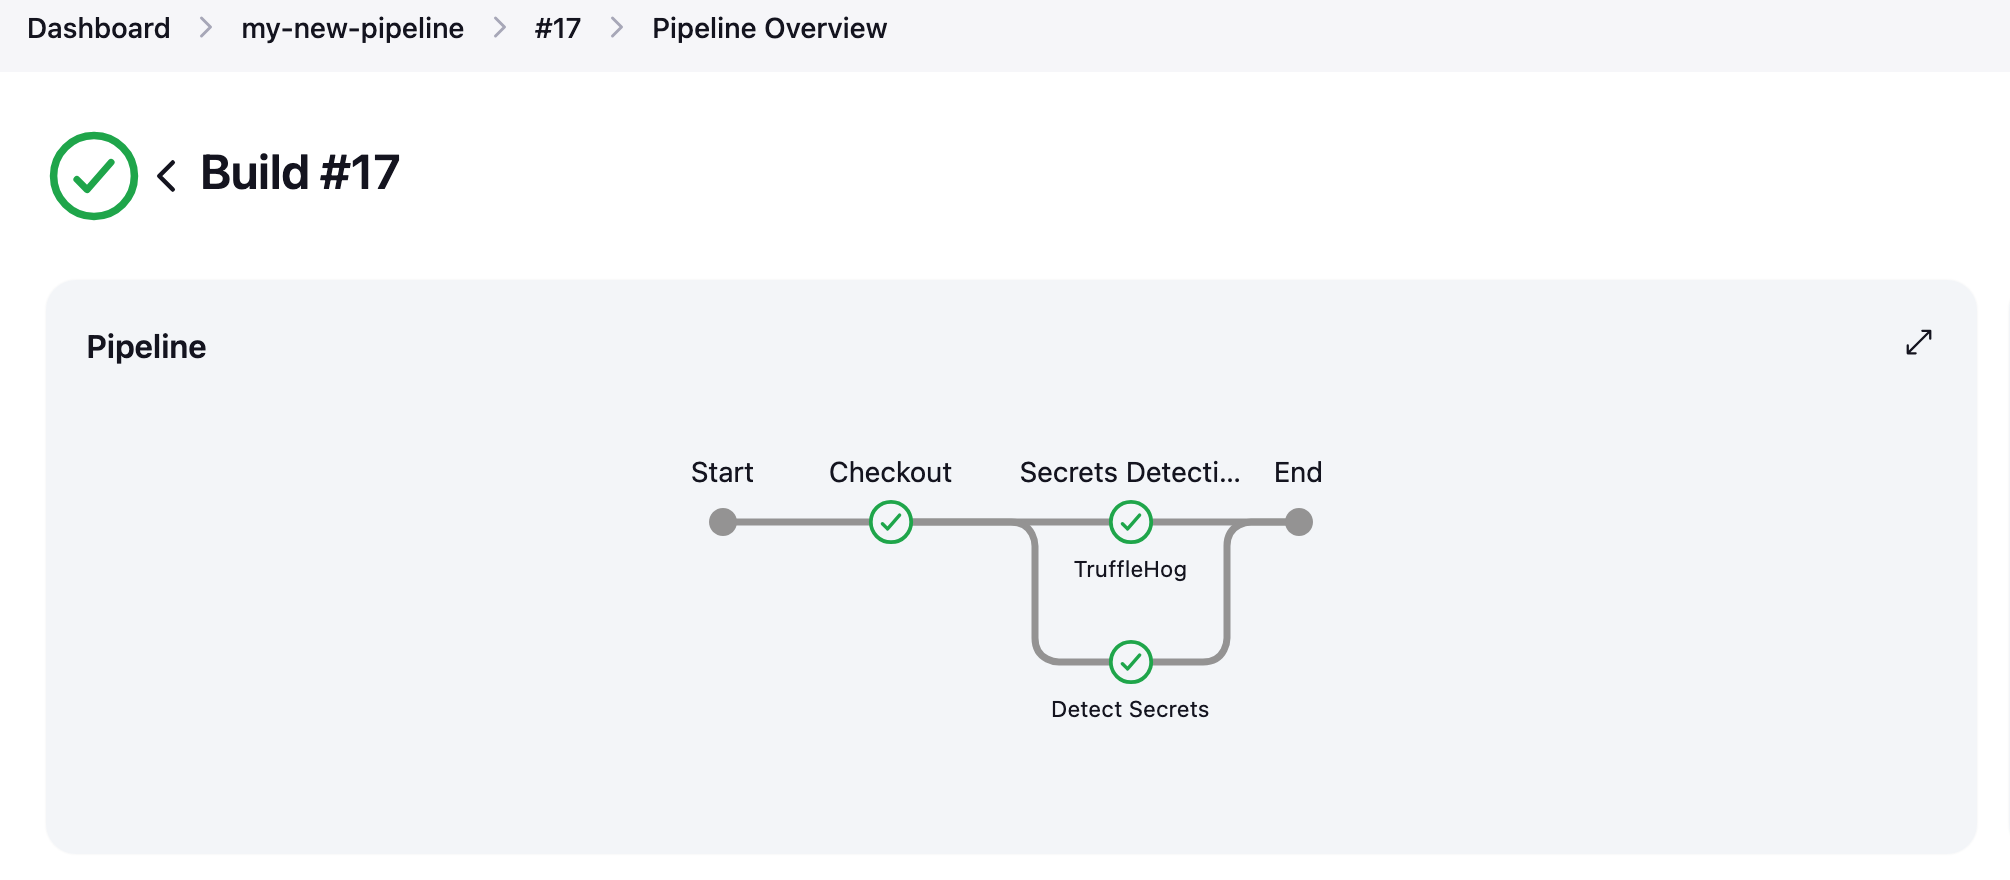
Everything together
- The final consolidated jenkins pipeline script will be as shown below.
- To speed up the pipeline or reduce the time it takes to complete, we can run the TruffleHog and Detect Secrets stages in parallel.
pipeline {
    agent any

    stages {
        stage('Checkout') {
            steps {
                // Clone the repository master branch
                echo 'Cloning the code from our repo ...'
                git branch: 'master', url: 'https://github.com/ScaleSec/vulnado.git'
            }
        }
        stage('Secrets Detection') {
            parallel {
                stage('TruffleHog') {
                    steps {
                        echo 'Running TruffleHog scan ...'
                        // Run TruffleHog scan on the checked-out repository
                        sh 'trufflehog git https://github.com/ScaleSec/vulnado.git --json --no-update > trufflehog-results.json'
                        // Optionally, you can archive the results
                        archiveArtifacts artifacts: 'trufflehog-results.json', allowEmptyArchive: true
                        // Read and print results to console
                        script {
                            def truffleHogResults = readFile('trufflehog-results.json')
                            echo "TruffleHog Scan Results: ${truffleHogResults}"
                        }
                    }
                }
                stage('Detect Secrets') {
                    steps {
                        script {
                            try {
                                // Run detect-secrets scan
                                sh 'detect-secrets scan > detectSecretsResults.json'

                                // Archive the scan results
                                archiveArtifacts artifacts: 'detectSecretsResults.json', allowEmptyArchive: true

                                // Read and print results to console
                                def detectSecretsResults = readFile('detectSecretsResults.json')
                                echo "Detect Secrets Scan Results: ${detectSecretsResults}"
                            } catch (Exception e) {
                                echo "Error running detect-secrets: ${e.getMessage()}"
                            }
                        }
                    }
                }
            }
        }
    }
}
Next steps
This is the end of Part 1. In the upcoming Part 2 we will continue enhancing the DevSecOps pipeline by integrating Semgrep for Static Application Security Testing (SAST). This addition will help identify code-level vulnerabilities early in the development process, enforce security policies, and improve overall application security.